You want to enter a project code or client billing code before the print jobs print to charge back your clients
for
the printer usage.
Step
1. In Print Job Manager menu item "Preferences --> Advanced,"
select the following options:
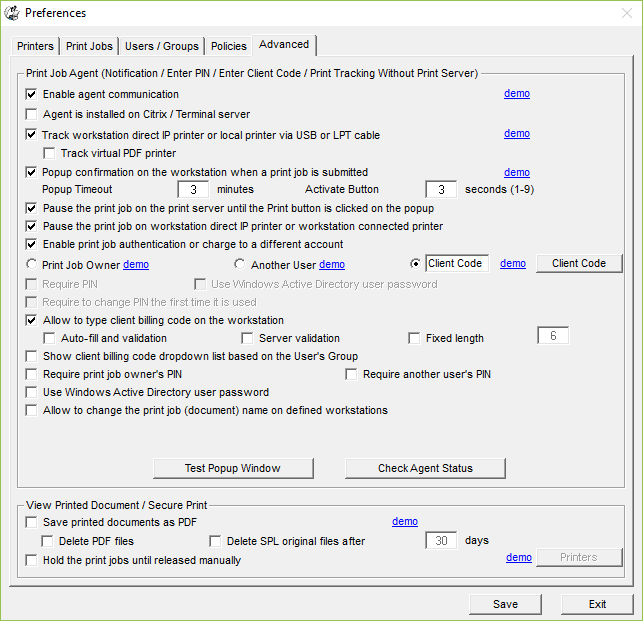
Step 2.
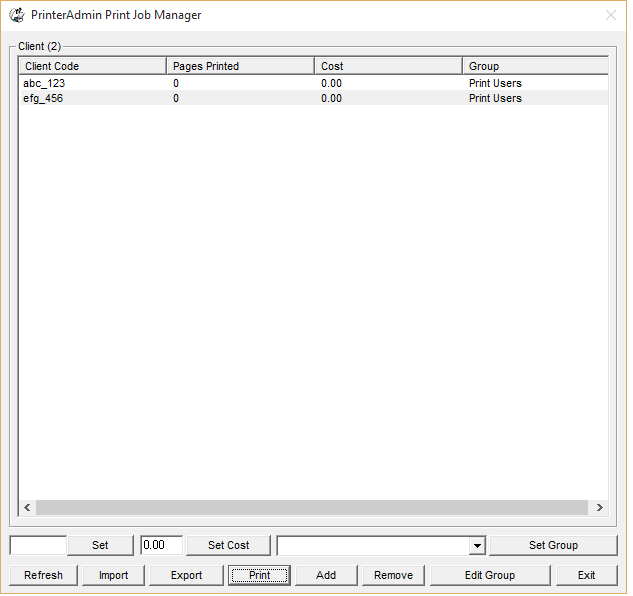
Click Billing Code button to add client billing
code. The billing codes can be exported to an MS Excel CSV file or import from an MS Excel CSV file ((Example).
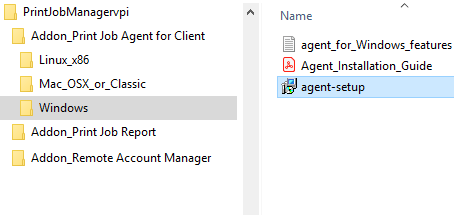
Step 3.
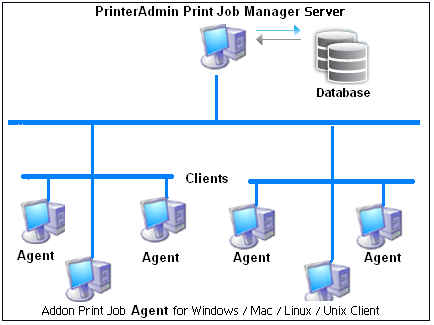
Install Print Job Agent on client computers (Windows,
Mac OSX/Classic, or Linux client computer).
For example, to
install Print Job Agent on Windows clients, copy "agent-setup.exe" to the network share or client computer,
double-click "agent-setup.exe" to install
the agent.
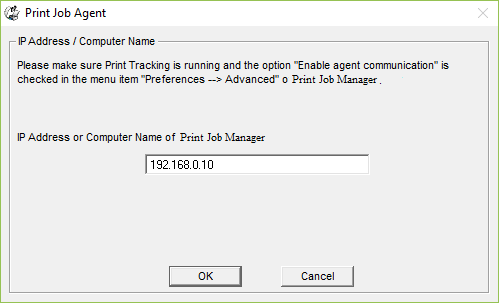
Step 4.
Click Start -> All Programs -> Print Job Agent
-> Print Job Agent to run the agent. Enter the computer name or the IP Address of the computer (For example 192.168.0.10) that
has Print Job Manager installed.
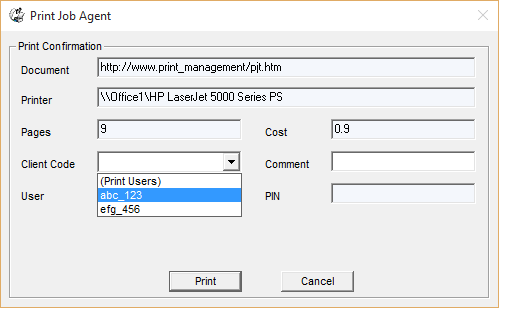
Step 5.
When users print, they can either click the Print button
on the popup to print or Cancel button
to cancel.
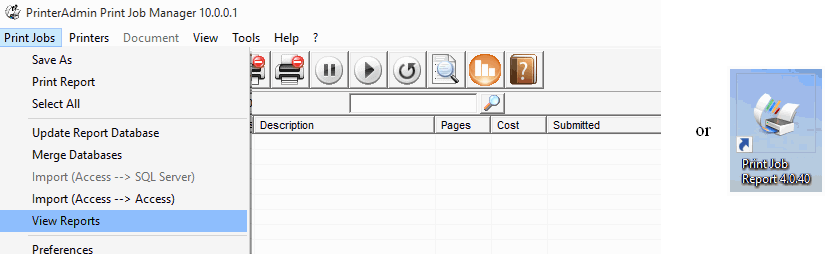
Step 6.
Click Print Job Manager menu Print Jobs
-> View Report or double-click the shortcut "Print Job Report" on the desktop to run Print Job Report, then
connect to the default database C:\Program Files\PrinterAdmin
Software\Print Job Manager\PrintSaver.mdb
to create the report by client (For example, Printed
Jobs/Cost Summary by Client).
Tip:
1. Print Job Agent runs automatically when users
log into the computer.
2. Print Job Agent can be automatically installed
with Windows Group
Policy.

|